
Windows 8.1: Skonfiguruj VPN - jak to działa
Na przykład, aby uzyskać dostęp do sieci firmowej z domu, musisz skonfigurować połączenie VPN. Ta praktyczna wskazówka pokazuje, jak połączyć się z siecią VPN w systemie Windows 8.1.
Skonfiguruj sieć VPN w systemie Windows 8.1
Wykonaj poniższe czynności, aby skonfigurować sieć VPN w systemie Windows 8.1:
- Kliknij prawym przyciskiem myszy symbol sieci, aby otworzyć okno wyboru. Ikona sieci znajduje się w prawym dolnym rogu paska zadań.
- Kliknij pozycję „Otwórz centrum sieci i udostępniania”.
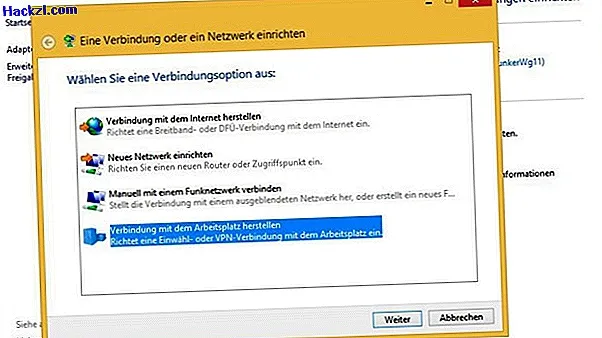
- W otwartym Centrum sieci i udostępniania wybierz „Skonfiguruj nowe połączenie lub sieć”.
- Teraz musisz kliknąć najniższy punkt „Nawiąż połączenie z miejscem pracy”.
- Jeśli połączenia zostały już skonfigurowane, wybierz opcję „Nie, utwórz nowe połączenie”.
- Następnie na liście kliknij „Użyj połączenia internetowego (VPN)”.
- Wprowadź adres IP serwera VPN w następującym oknie. Możesz także tutaj zdefiniować nazwę połączenia. Na koniec kliknij „Utwórz”, aby zapisać konfigurację połączenia VPN.
Połącz się z siecią VPN w Windows 8.1
Aby aktywować utworzone połączenie VPN, konieczne są tylko następujące dwa kroki:
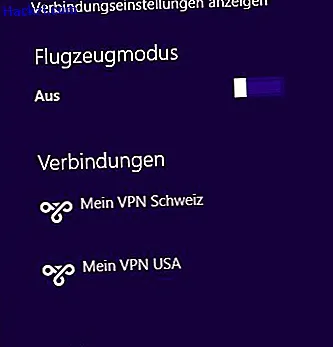
- Kliknij lewym przyciskiem myszy ikonę sieci w prawym dolnym rogu paska zadań.
- Wybierz nowe połączenie VPN w „Połączenia”. Podczas łączenia po raz pierwszy nadal musisz wprowadzić swoje dane dostępowe. Możesz zapisać to na stałe.
Jeśli potrzebujesz innego dostawcy VPN, porównaliśmy 5 najlepszych dostawców dla Ciebie.